Safety Tips To Implement When Using Extra-Long Drill Bits
Safety Tips To Implement When Using Extra-Long Drill Bits
 2026-06-18T10:56:01-08:00
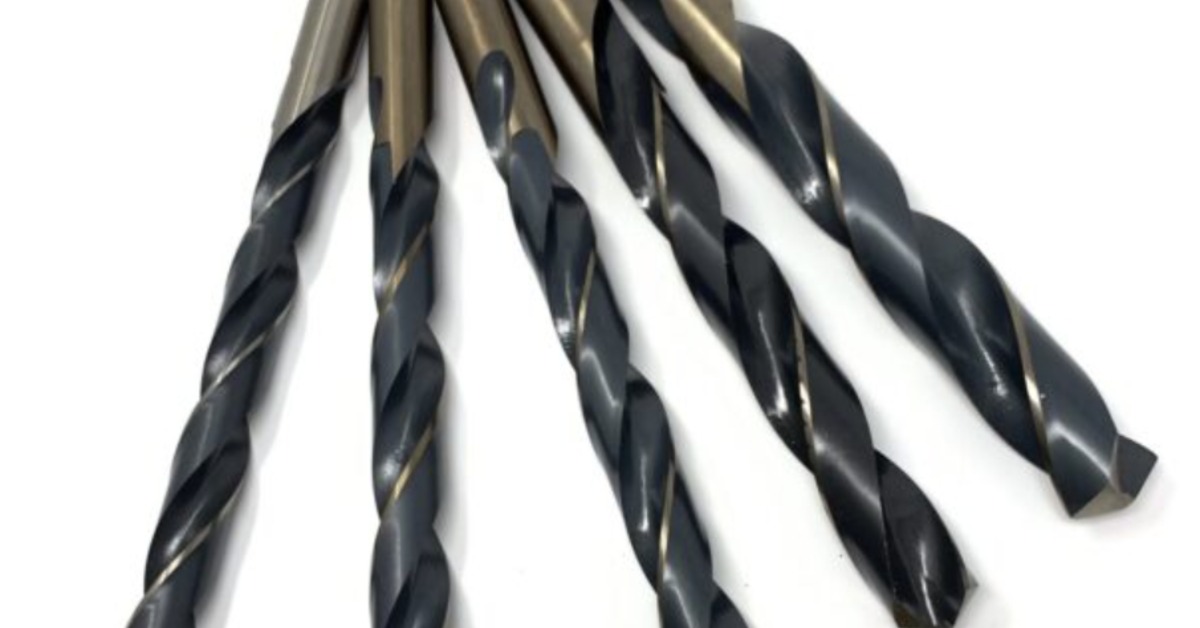
Deep-hole drilling often requires tooling that can reach areas standard-length bits can’t access. Extra-long drill bits work well for tight spaces, extended reach jobs, and challenging hole depths.
Their added length also calls for careful handling. A small alignment issue near the shank can lead to bit wander, vibration, heat buildup, or breakage at the cutting end.
That’s why it helps to follow smart safety tips when using extra-long drill bits before the bit ever touches the material. The goal isn’t to rush through the cut. It’s to keep the bit straight, let the cutting edge work, and protect the operator from avoidable hazards.
Start With the Right Bit for the Material
A safe drilling job starts before the bit touches metal. Extra-long bits come in different materials, lengths, flute styles, and point designs, so the wrong choice can create problems right away.
Match the bit to the material, hole depth, and machine setup. When the job calls for long drill bits, choose a style that can handle the material without excess flex.
High-speed steel works well for many general-purpose metal drilling jobs, while cobalt can handle tougher metals and offers better heat resistance. Carbide can work for certain hard materials, though it needs a rigid setup because it doesn’t tolerate chatter well.
Bit length matters, too. Use the shortest bit that can reach the required depth. Extra length adds flexibility, and extra flexibility raises the chance of wobble. A bit that extends beyond the required length can bend under pressure, especially if the operator feeds too aggressively.
Inspect the Bit Before Drilling
Never start with a damaged bit. Extra-long drill bits place more stress along the tool’s body, allowing small flaws to grow during use.
Look over the bit before each job. Check the cutting edges, point, shank, and flutes.
A dull edge creates heat and forces the operator to push harder. A chipped point can make the bit walk across the surface. A bent bit can cause an oversized hole, rough finish, or sudden break.
Before You Drill, Check:
- The bit runs straight when rotated by hand
- The point has no chips or uneven wear
- The flutes have no packed chips or damage
- The shank sits cleanly in the chuck or holder
- The cutting edges still feel sharp and even
Replace damaged bits instead of trying to force them through the job. A fresh bit costs less than a ruined part, broken tooling, or injury.
Secure the Workpiece Before You Start
Stable workpieces are necessary for extra-long bits to prevent shifting during drilling, which can cause the bit to grab, bend, or snap. Use a vise, clamp, fixture, or drill press table.
Avoid hand-holding metal to prevent injuries. Support thin or irregular materials with backing plates to reduce burrs and prevent grabbing. Use a V-block or similar holder for round stock to prevent rolling.
Keep the Bit Aligned From the Start
Long drill bits can wander if the point doesn’t start cleanly, worsening as the bit drifts. Mark the hole before drilling and use a center punch on metal when possible. For accuracy, start with a shorter pilot drill to guide the longer bit.
Keep the drill square to the surface, and check the setup when using a drill press or mill. For handheld work, use a guide or fixture. Avoid side pressure, as extra-long bits don’t handle bending well; let the point cut straight into the material.
Use the Right Speed, Feed, and Cutting Fluid
Heat can shorten bit life and make drilling unsafe. Long holes trap chips and heat more than shallow ones, so the operator must control speed and feed from the start. Use a speed that matches the bit diameter and material; harder metals and larger diameters require slower speeds. Running too fast dulls the edge, causes heat discoloration, and increases friction.
Feed pressure is equally important: too much can flex or jam the bit, while too little causes rubbing and heat. Maintain steady pressure to produce clean chips, and use cutting fluid when drilling metal to reduce heat, improve chip flow, and protect the edge. Reapply fluid during deep drilling to prevent the bit from running dry.
Clear Chips Often During Deep Holes
Chip buildup can lead to problems with very long bits, such as packing inside the flutes, scratching the hole wall, trapping heat, or locking the bit in the hole. Peck drilling is recommended to manage this issue: drill a short distance, then back out the bit, clear out the chips, add fluid, and continue drilling. The deeper the hole, the more frequently you should clear chips—don’t wait until the drill squeals or the bit feels tight.
Keep an eye on the chips as you work; clean, curled chips usually indicate effective cutting, while dusty chips, smoke, or discoloration may mean excessive heat. Long stringy chips can wrap around the bit or workpiece, so remove them with a brush or tool after stopping the machine. Never use bare hands to remove chips, as fresh metal chips can cut skin and hot chips can cause burns.
Control Vibration and Runout
Longer bits tend to increase vibration. A chuck, holder, or spindle with excessive runout can cause the cutting tip to swing in a larger arc than the shank, leading to imprecise holes and an increased risk of breakage.
Properly seat the shank, then tighten the chuck or holder per the machine’s setup. If the bit slips, stop and readjust it. Avoid drilling with a bit that moves in the chuck; instead, cut the length extending from the chuck to only what is necessary for the hole. Less unsupported length improves control.
If chatter occurs, stop and identify the cause—speed might be too high, feed uneven, the bit dull, or the workpiece insufficiently supported. Forcing through chatter can damage both the bit and the workpiece.
Wear the Right Safety Gear
Extra-long drill bits pose hazards similar to standard bits, with added risks from flex, chip flow, and deeper drilling. Always wear eye protection. Metal chips can eject quickly, especially when exiting the hole or clogging the flutes. Avoid loose sleeves, jewelry, or anything that could catch near the rotating bit. Tie back long hair.
Wear gloves when handling raw material or scrap, but not near a rotating drill. Keep the area clean, removing chips, tools, and offcuts before drilling. A tidy setup improves control and reduces the risk of shifting.
Know When to Stop and Reset
Operators often break overly long bits while attempting a poor cut. Halt when the bit squeals, binds, wobbles, or ceases producing clean chips. Remove the bit, clear out the hole, check the cutting edge, and adjust the setup accordingly.
Don’t force a stuck bit; instead, gently reverse it if possible, add coolant, and remove chips as needed. If the hole has shifted or hardened due to heat, forcing the same bit deeper can exacerbate the damage.
The best safety habits to implement with extra-long drill bits come down to control. Choose the right bit, hold the work securely, drill at the right pace, and clear chips before they cause trouble.
Drill Bit Warehouse carries extra-long drill bits and other metal-cutting tools for demanding jobs, so you can match the tool to the material and work with greater confidence from the first hole.