


Solving Common Problems With Carbide Bits
Solving Common Problems With Carbide Bits
 2026-07-10T10:27:58-08:00
Carbide bits can handle tough metal, tight tolerances, and repetitive drilling, but they still need the right setup. When speed runs too high, feed feels uneven, or the workpiece moves, even a strong bit can chip, squeal, wander, or wear too soon.
A good setup matters from the start, especially when you’re solving common problems with carbide bits, such as chatter, wandering, heat buildup, and early wear.
Understanding how these issues develop makes it much easier to prevent them and get the performance carbide is designed to deliver.
Why Carbide Bits Fail During Metal Drilling
Most carbide bit problems come from friction, movement, or poor chip flow. The bit may have the right material and geometry, but it can’t perform well when the drilling conditions work against it.
Carbide has excellent hardness, but that hardness comes with less flexibility than some other drill materials. If the bit catches, enters at an angle, or hits an uneven surface, the cutting edge can chip fast. That’s why carbide often works best in a rigid setup with steady pressure and proper speed.
Common causes of carbide bit trouble include:
- Running the spindle too fast for the material
- Feeding too lightly or too aggressively
- Starting without a solid center mark
- Letting chips pack inside the hole
- Using a worn bit after the cutting edge rounds over

Problem 1: The Bit Chatters or Squeals
Chatter often means the bit doesn’t have stable contact with the metal. You may hear a high-pitched squeal, see rough marks around the hole, or feel vibration through the setup. That noise usually signals movement, rubbing, or poor cutting action.
Start with workholding. Clamp the metal firmly and support thin stock so it doesn’t flex under pressure. A loose workpiece can move just enough to damage the edge, widen the hole, or leave a rough finish.
Next, check speed and feed. Carbide usually likes steady pressure. If the operator barely feeds the bit, the edge may rub instead of cut. That rubbing builds heat and wears the bit faster.
Problem 2: The Bit Chips at the Cutting Edge
A chipped carbide bit often points to impact, side pressure, or poor alignment. Carbide cuts well when the force stays straight and steady. It struggles when the operator rocks the drill, enters at an angle, or breaks through with too much force.
Use a rigid setup whenever possible. A drill press, mill, or mag drill can hold alignment better than handheld drilling. If you need to drill by hand, use a center punch to mark the spot and start with controlled pressure until the point seats.
Watch the entry surface, too. Scale, weld seams, and uneven metal can make the bit hit harder on one side of the cutting edge. Clean the surface when possible, and give the bit a stable path into the material.
Problem 3: The Hole Comes Out Oversized
An oversized hole often results from wandering, runout, chatter, or poor starts. Carbide bits require a clean entry point as they don’t flex like softer drills. Mark the hole carefully, use a center or spotting drill for accuracy, keep the bit perpendicular, and avoid forcing it if the start is bad.
Also, check the holder for wear or dirt, as a worn chuck or dirty collet can cause runout. Clean and seat the bit properly, and inspect the setup if hole size varies.
Problem 4: The Bit Gets Hot Too Fast
Heat can shorten bit life, discolor the workpiece, and dull the cutting edge. Carbide handles heat better than many materials, but no bit benefits from constant rubbing.
Use the right speed for the metal. Harder materials often need slower speeds and controlled feed. Cutting fluid can also help move heat away from the tool and improve finish quality.
Chip evacuation matters, too. Packed chips trap heat in the hole. Peck drilling can help on deeper holes because it gives chips room to clear and lets the cutting edge re-enter with less resistance.
Problem 5: The Bit Wanders Before It Cuts
Wandering often begins before the drill bit fully penetrates the material. Slick metal surfaces provide little grip for the bit, especially if drilling starts too quickly. If the bit walks off center, the hole may become inaccurate before cutting even begins. To prevent this, use a center punch, layout dye, or spotting tool to steady the start. Keep the drill at a right angle to the surface and begin slowly until the point creates a clean indentation. For consistent results, employ a jig or fixture to ensure precise hole placement and minimize side forces. A stable guide helps the bit enter smoothly and reduces the risk of edge damage.
Problem 6: The Bit Dulls Sooner Than Expected
Premature dulling can come from the wrong speed, poor lubrication, abrasive scale, or drilling material that exceeds the bit’s intended use. Carbide lasts a long time, but only when the setup supports the cutting edge.
Look at the chips. Healthy drilling often produces consistent chips rather than fine dust or blue, overheated fragments. Dust can mean the bit rubs instead of cuts. Blue chips can mean too much heat.
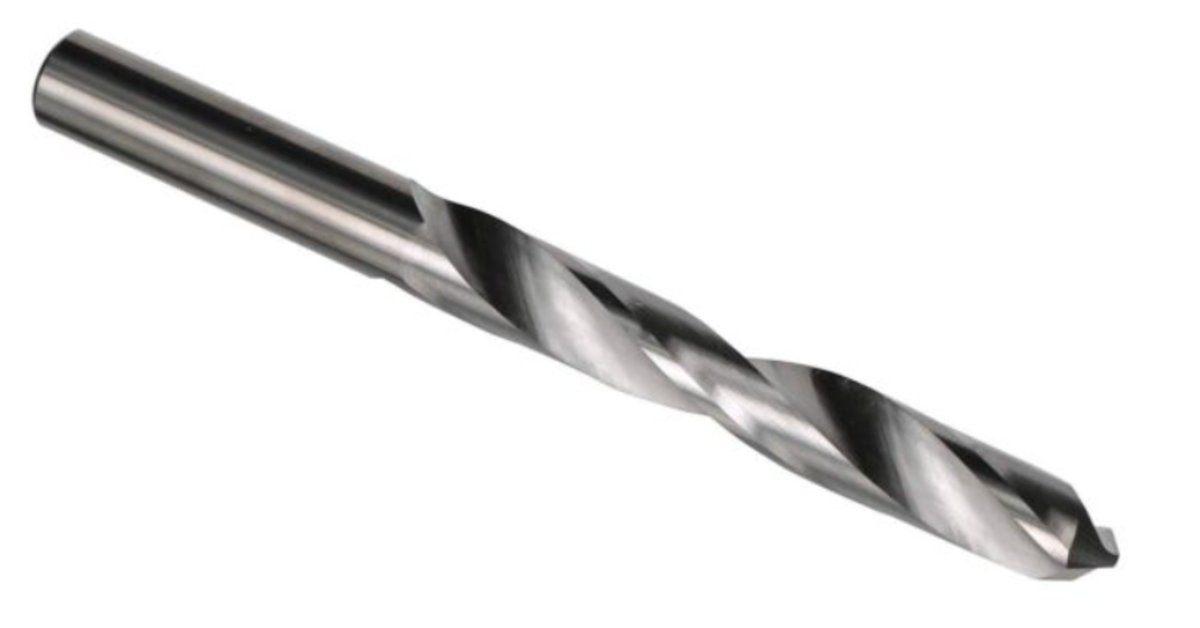
Select the bit style based on the specific job. Solid carbide, carbide-tipped, and specialty carbide options each cater to different drilling requirements. For challenging metal applications, buyers typically evaluate flute style and point geometry before selecting carbide drill bits for metal that are well-suited to the job.
Problem 7: The Bit Breaks During Use
Breakage often comes from side load or sudden binding. A carbide bit can snap if the operator tilts the drill, if the hole closes on the bit, or if chips jam in the flutes. The risk increases when the setup lacks support or the bit reaches too far from the holder.
Keep pressure straight and steady. Don’t use the bit as a reamer unless the tool’s design supports it. If you need to enlarge a hole, step up through proper sizes or use the correct finishing tool.
Breakthrough needs care as well. Ease pressure as the bit exits the material. Too much force at breakthrough can catch the edge and chip or snap the bit.
How to Get Cleaner Results From Carbide Bits
Good results come from control. Carbide performs best when the setup reduces vibration and keeps the cutting edge engaged. Before drilling, review the workpiece, bit condition, holder, and drilling speed.
A few habits can help protect the tool and improve hole quality:
- Match the bit to the material and hole depth
- Secure the workpiece before contact
- Use a center mark for accurate starts
- Control speed before heat builds
- Clear chips before they pack the flutes
- Ease pressure at breakthrough
These steps also help you spot problems sooner. If the bit squeals, rubs, or creates poor chips, stop and adjust the setup before damage gets worse.
Choosing the Right Carbide Bit for the Job
A carbide bit’s effectiveness varies by application, depending on material hardness, hole depth, and machine rigidity. Choice depends on metal, finish, and conditions. Carbide-tipped bits suit general metal drilling, while solid carbide is ideal for production, abrasive materials, and precise work.
Longer bits require more care due to deflection; shorter, rigid tools offer better control when reach isn’t crucial.
Drill Bit Warehouse carries carbide drill bits and related tooling for metalworking needs. Match the choice to the material, hole size, drilling depth, and equipment before you start cutting.
Better Setup Means Fewer Carbide Bit Problems
Carbide bits reward careful setup. When you control speed, feed, alignment, and chip flow, you reduce chatter, chipping, heat, wandering, and breakage. If a bit keeps failing, look at the drilling conditions before blaming the tool.
Strong results come from pairing the right bit with steady handling. When you’re focused on solving common problems with carbide bits, most fixes start with steadier setup, cleaner chip flow, and better speed control.