Drilling is one of the mandatory steps as you do renovation work, contractor jobs, or other labor-intensive jobs. When it comes to drilling in concrete, brick, and asphalt, the last thing you want is to break your tools mid-job. Here are some tips for understanding masonry drilling and steps toward successful drilling.

What Are Masonry Drill Bits?
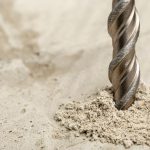
You must rely on masonry drill bits when drilling through tough materials such as concrete, asphalt, and brick. Masonry drill bits have an effective strength for drilling holes through rigid materials, including stones and blocks. The masonry drill bit is designed for drilling through various masonry materials, as its edge is made from bonded tungsten carbide with a spiral steel shaft. While most masonry drill bits work best with hammer drills, which create a hammering motion as you drill, they are also helpful alongside power drills as they take considerable effort. As you drill, it’s crucial to check your masonry bits while using the hammering effect, as it can result in your bit shattering. When using a hammering drill and masonry drill bit, use slow rotations as you drill into more stubborn, challenging surfaces.Masonry vs. HSS Drill Bits
So, what is an HSS drill bit? A high-speed steel (HSS) drill bit is a useful, cost-effective tool that applies to many drilling applications. It’s useful for drilling into hardened plastics and several types of metal. HSS bits offer a tough, heat-resistant design that’s suitable for high-speed applications and provide long-lasting performance. However, a few things set HSS and masonry drill bits apart. Firstly, a significant distinction between HSS and masonry drill bits is how they function. While HSS drill bits are often used for many types of metal, masonry drill bits will work best with bricks, asphalt, and other similar materials. Moreover, the tip angle of a masonry drill bit is different from an HSS bit, which is 135 degrees, to give it additional strength. The cutting tip of a masonry bit is also ground at an angle with no spur point at its center. These features allow for rotational and hammering forces as it drills.Safety Tips To Consider
Before you start drilling with your masonry bit, it’s crucial to practice proper safety, so you and other workers don’t get hurt. Firstly, you’ll always want to use safety gear to protect your body, including eye protection, hearing protection, heavy gloves, a dust mask or respirator, long sleeves, and boots. You’ll also need the equipment to drill through brick, stone, concrete, and asphalt. You’ll need a hammer drill, carbide-tipped masonry bits, corded or cordless rotary drill, hammer, shop vacuum with a HEPA filter and bag, safety gear, and a hammer. From there, you can move forward with drilling.Steps for Drilling Concrete & Asphalt
While there aren’t many steps for drilling concrete and other similar materials, it’s necessary to prevent damage, breakage, and injuries. So, let’s go over the steps for proper concrete, asphalt, and brick drilling.Create a Drill Point & Install Depth Stop
The best way to start drilling against concrete is by creating a drilling hole. It can become a complicated endeavor when making a hole in smooth concrete, as the surface tends to cause slipperiness, preventing the drill from meeting its desired spot. You’ll want to lightly tap a center punch or nailset with a sturdy hammer, creating a small indent on the concrete surface. This will help keep your drill stable and give it a grip. Once you’ve created your drill point, you can install a depth stop. Depth stops are collars that fit around your drill bit to allow it to drill at specific depths while preventing it from going too deep. You’ll want to adjust your depth stop on the side of your drill to the desired depth of the intended hole.Attach Your Drill Bit & Set Up Shop Vacuum
Once your drill point and depth stop are ready, you can add your drill bit to the tool. Depending on whether you use a rotary drill or a hammer drill, there are a few ways to install your drill bit. With hammer drills, they use a chuck-key system for securing the bit of the hammer. You open the chuck jaws with a key, insert your bit, then turn the chuck key clockwise to provide a secure fit. As for rotary drills, you open the chuck by turning it counterclockwise, inserting the bit, and turning it clockwise to tighten it. After you attach your drill bit, you’ll want to set up your shop vacuum, which will help catch debris. You’ll start by placing the nozzle of your shop vacuum within two inches of the drill point. For drilling on concrete flooring or slab, kneel lightly on the nozzle to keep it in place. You can also use a heavy object over the nozzle to secure it. From there, turn on the shop vacuum and move on.Slowly Start Drilling & Take Frequent Breaks
As you turn on your shop vacuum, you can slowly start drilling. Squeeze the trigger gently to begin the rotation of your drill at a slow speed. You’ll want the drill to do most of the work, so ensure that you lightly press on the drill and let it do the job. Throughout your drilling, you want to take frequent breaks. It will allow your tools to cool down and allow you to vacuum out any loose debris from the drill hole. Keep an eye on the drill bit condition during each break to spot any signs of chips, dullness, or wear.Other Helpful Drilling Tips
Drilling into concrete, asphalt, and brick can become time-consuming and laborious, so remember that you want only to drill as far as you allow at a time. You’ll want to limit the hole depth by incorporating a depth stop rod, which is often included in most hammer and rotary drills. Moreover, remember to use reduced pressure when drilling into lighter surfaces, such as brick or concrete, to prevent cracking and damage. If you need to increase safety, using an auxiliary hand on your drill will allow you to apply more pressure without fearing potential injuries. Installing an auxiliary handle is incredibly helpful for masonry work, especially if it comes with your drill. The more cautious you are with your masonry work, the better the result will be. For over 40 years, Drill Bit Warehouse has served the aerospace, armament, engineering, energy, industrial, and automotive manufacturing industries with the highest-quality drill bits and cutting tools. We take pride in our stellar quality and customer service, providing the knowledge and experience to help guide customers on every drilling requirement they need to fulfill. Our masonry drill bits for concrete come with tungsten-carbide tips that offer uninterrupted drilling through reinforced concrete and rebar. Contact us today if you have any questions.